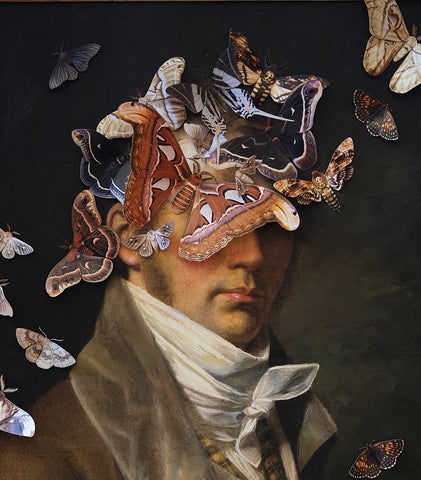
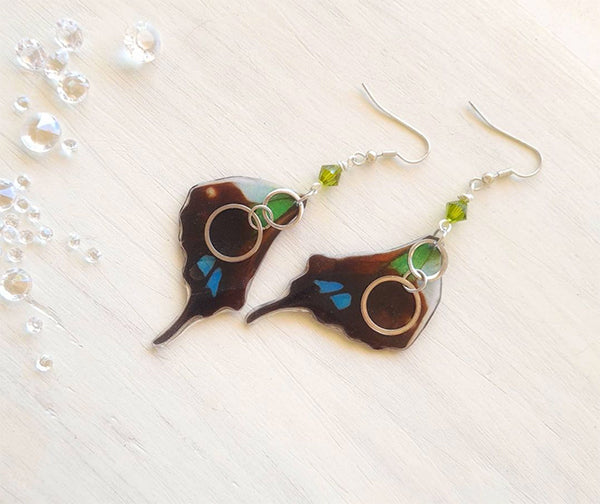
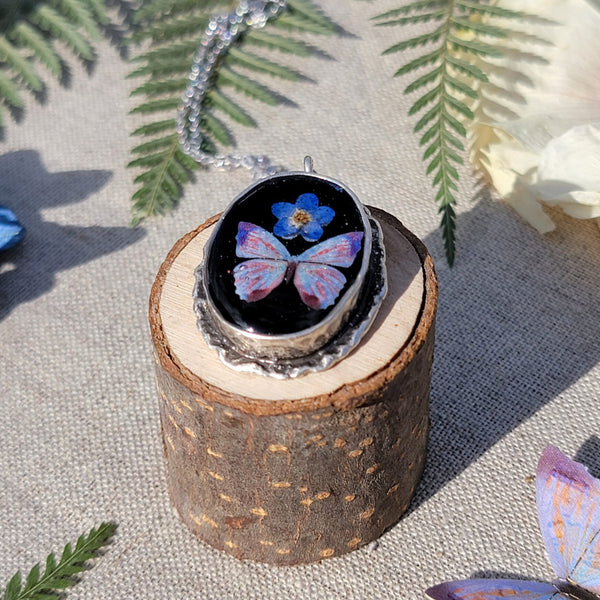
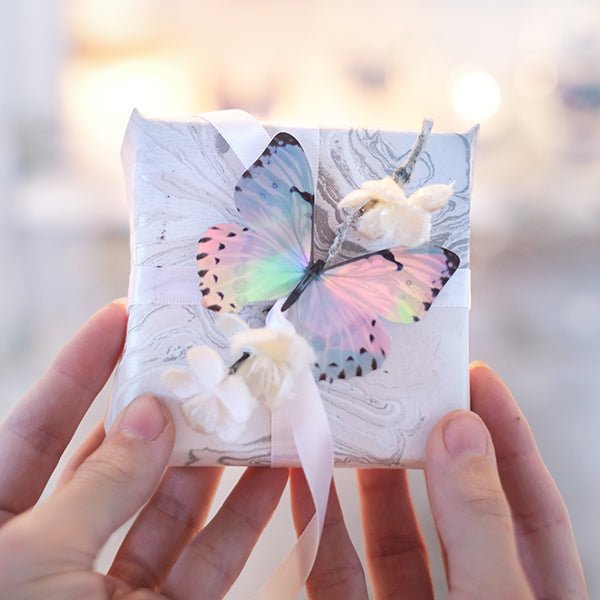
Our products are packaged flat on a cardstock backing, protected in a clear plastic sleeve. They can be easily displayed on card racks! Below is an example of a display at Terra Bella Flowers.
Alternately, they can also be worked into table displays with other products, as showcased in the below photo by Crush & Touch Art Supply.
We recommend having a few unpackaged specimens near the sellable product. This helps convey to customers that the specimens can be removed from the backing, and that they are printed double-sided. We love how LUCCA Great Finds displayed a few paper moths and butterflies in a mirrored glass case!
Alternately, you can make a craft project with some specimens, like this shadowbox by Grapheme using our Micro specimens, to give customers ideas and showcase the interactive nature of our products.
Our paper moths and butterflies compliment a wide range of other products, and we suggest incorporating them into displays and pairing them creatively with like-minded products.
Finally, you'll find a few interactive Kits in our catalog, including a Watercolor Kit and Coloring Kit. We suggest displaying these with art supplies, like at Crush & Touch Art Supply.
We hope that these ideas help incorporate our products into your shop! We always love seeing creative ways that our products are displayed. Please tag us in your shop's photos @mothandmyth
]]>Follow along with the video and written steps below!
Supplies:
* Halloween Bat Multi-Pack
* Black 2mm Rope
* Black Acrylic Beads 2mm Hole
* Black Tassels
* Hole Punch or Exacto Knife
* Scissors
Start by making holes in the wings of the bats for the rope to go through. You can do this with either the hole-punch or Exacto knife. We recommend placing the hole on the vein on the paper bat wings - this doesn't need to be exact!
Next, we're going to cut three pieces of the rope. The first one will be 6' long - this one will be used as the main part of the garland. The other two will be 24" long - these will be the tassel ends.
We'll work with the shorter lengths first! We'll string 6 beads on each of the shorter lengths of rope. We lightly singed the ends of rope first, to make threading the beads a little easier.
Once we've threaded all the beads, we'll tie one tassel on each end of the shorter ropes with a simple knot.
Fold the shorter lengths of rope at the middle point and separate the beads (3 on each end).
Now that we've completed the shorter ropes, we'll move on to the 6' long one! We'll start by threading 3 beads on one end, and adding one tassel with a knot.
With one end complete, it's time to start threading the bats! We'll thread them from the opposite end of the rope. You can play around with how you would like your bats to be positioned, and remember that they can alternate between facing forwards and backwards if you'd like!
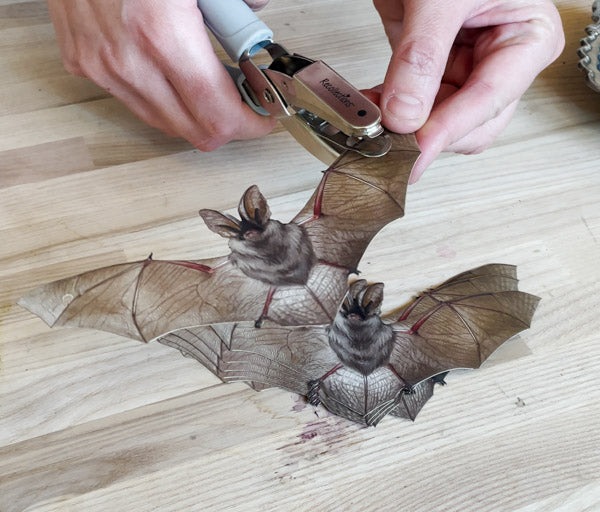
Once all the bats are strung on the garland, it's time to complete the other end of the long rope. Add three more beads and one tassel.
Next, we'll tie our shorter lengths of rope onto the long rope to complete the tassel ends. We like these to be at varying lengths to make the tassel ends more dynamic, so play around with how you like it and then tie the shorter ropes onto the longer one with a knot.
All that's left now is to style the bats to make them appear even more life-like! We'll gently curl their wings & ears around our fingers to give them a bit of shape and really bring them to life.
And that's all there is to it! The bat garland is a fun an easy piece of decor that's perfect for the Halloween season. You can pack it away and use it again in future years!
We can't wait to see how you'll decorate for Halloween with Moth & Myth paper specimens, and hope you've enjoyed this tutorial!
]]>
The materials you'll need are really simple and easy to come by! In this project we use:
Glass Apothecary Jar: We sourced ours online at Amazon - they were sold as a set of three for under $50. You can find many different shapes, sizes, and styles, and you really can't go wrong.
Moss and Natural Materials: For some styles of jars, you'll want to use moss and other types of natural materials to add texture and visual interest. In our Seahorse Apothecary Jar, we use two different types of moss (which you can often find at a floral shop) and a bit of dried seaweed we collected from the beach!
Paper Specimens: The double-sided paper skeletons and specimens in our Wunderkammer Relics Collection are perfect for these Jars. In this tutorial, we are working with the 'Seafoam' Seahorse, 'Temptress' Snake, and limited 'Weaver' Spider & Spiderweb sets.
Optional Adhesive: You can create this Apothecary Jars without using any glue or adhesive, but we use a small amount of Museum Putty in the snake jar.
We sourced moss from a florist, and collected dried seaweed from a local beach.
Glass Apothecary Jars are easily sourced online. Ours came as a set of 3 with different silhouettes.
The first Apothecary Jar we'll create features the largest seahorse from our 'Seafoam' Wunderkammer Collection. We chose the longest jar for this, because it complements the shape of the paper specimen.
Begin by placing a bit of moss in the bottom of the jar. We started with Spanish Moss, which we gently placed in the bottom (there's no need to smush it down!), and continued layering with a different type of moss to add more texture.
Continue layering with your natural materials. We used a darker piece of dried seaweed next, so that the light coloration of the seahorse pops out against it. Once you're happy with the natural materials, it's time to gently pop in the paper specimen!
All that's left now is to put the glass top on the Apothecary Jar! We decorated ours with a small moth from the 'Witching Hour' Collection, which we attached with a small amount of Museum Putty.
Next, we'll create the Spider & Spiderweb Apothecary Jar. This is one is very simple, but also very stunning, and features the 'Weaver' Set. This soft-spun Spiderweb is also sold individually in the 'Gossamer' Set or, as a Multi-Pack, but it's only here until October 31st!
Begin by gently placing the spiderweb into the jar. We chose a slightly wider Apothecary Jar for this specimen, to show off the details of the web.
When you're happy with how the web is positioned, it's time to add the spider. Gently bend the legs around your fingers to give them a bit of shape. There's no need for glue to attach it - just work two or three of the little legs into the gaps of the spiderweb, and it will stay in place!
Next, put the glass lid on the jar, and enjoy this spooky seasonal creation!
Finally, we'll create an Apothecary Jar with our 'Temptress' Snake Skeleton. For this jar, we use two snake skeletons. The first step is to gently bend the ribs of the snake around your fingers, to give them a bit of natural shape. We also break the few ribs where the paper snake is connected, to make it more flexible.
We take the first shaped snake, and work it into the bottom of the Apothecary Jar. You can play with the positioning, but the first snake is mostly there to add shape and volume.
When the first snake is in place, it's time for the second one! We work the tail and a few of the coils into the jar, but leave the head out, wrapping around the outside of the jar. This gives a really interesting dimensional look to this Apothecary Jar!
If you're having a hard time getting the snake's head to stay positioned how you'd like it, a bit of Museum Putty will help keep it in place.
This project takes under an hour, but you can take your time collecting natural materials and playing with the placement of the specimens. We hope you're enjoyed this tutorial, and are inspired to work with our paper specimens for yourself!
]]>
Materials you'll need for this project:
Passion Flower Kit & Poster
Shadowbox - We're using an 11" x 14" Shadowbox that fits the poster perfectly! This shadowbox is available from Amazon
Putty or adhesive of your choice! We're using Museum Putty, but hot glue or glue dots would also work!
Before you begin putting together your shadowbox, remember to assemble your Passion Flower! We have another tutorial that goes over all of the necessary steps!
1. Take off the frame and glass of your shadowbox so you can work with the backing
2. Flip over the Passion Flower Poster and put a little bit of Museum Putty (or other adhesive) in each corner to attach it to the Shadowbox backing
3. With the poster attached to the backing, it's time to start placing your flower and butterflies! There's no wrong place to put these, so play around and find what looks good to you before adding adhesive!
4. We're adding a little bit of adhesive on each tendril to give more dimension to the flower.
5. Style your butterflies by gently bending the wings where they meet the body, and curling the wing-tips. Then play around with placement and attach them to the poster!
6. When you're happy with where the elements are placed and everything is adhered to the poster, all that's left is to put the shadowbox frame back together!
7. Fasten all of the clamps on the back of the frame, and you're done!
That's all there is to it! Once you're finished, you'll have a beautiful multi-dimensional shadowbox to display your Passionflower and butterflies!
]]>All you need to create a beautiful butterfly bouquet of your own is:
Once you're finished, your butterflies will really look like they're flying out of the bouquet! We hope you enjoy this project, and can't wait to see what you'll create!
]]>
As mentioned in the video, our favorite adhesives are:
Museum Putty - which holds our specimens in place without damaging the specimen or the item it is being attached to. Museum Putty is fantastic for many projects, but it is not permanent, and can move around over time, especially when exposed to changing temperatures.
Double-Sided Tape - there are many options for double-sided tape, and most of them work quite well! In the video, we are using a heavy-duty tape, that needs to be cut down to the desired size. In our experience, this tape can damage the specimen if you choose to remove it, but does not damage the wall or other item you are attaching the specimen to.
Hot Glue - which is fantastic for projects where you wish to permanently attach our specimens!
We hope that this little guide helps give some ideas about how to use our specimens in a variety of different projects!
]]>She clutched the tattered invitation tightly, stained and crumpled from hours of turning it over with sweaty fingers while waiting on the train for the miles to slip by. It had been such an unexpected summoning from her childhood friend Rose — no word for years, and now out of the blue, an invitation to a tea party.
Rose had suddenly moved away from the town they grew up in, where they had shared golden afternoons in gardens, invented games to which no one else knew the rules. It had been like a great dark void at first when Rose moved to the North, but over the years the ache grew less and less, until she barely thought of it these days. When the letter had arrived, with its sudden invitation to the mist-enveloped countryside where Rose now resided, she was uncertain if she would even go. Yet curiosity tugged at her, and she gathered a beaded party-gown, fine lace gloves, and a small gift for her friend as a token of goodwill.
“Teatime. Tuesday. The First of Spring.” Was all the delicately printed card had specified.
An old taxi dropped her at the huge wrought iron garden gates, and she stood for a moment gathering her thoughts, then slowly pushing open the creaking doors to the garden. The air was chill despite the spring light, and she gathered her shawl a bit tighter to her shoulders. A narrow vaulted tunnel of thick hedges led into the grounds, tangled and overgrown in a thick tapestry of branches and vines. The path turned this way and that, maze-like, and she felt a wave of dizziness overtake her like vertigo, following the small trail deeper into the garden. What an unusual place — she could not picture the young Rose she remembered living here. A thick blanket of leaves covered the pathway undisturbed by footfalls, the deeper she walked into the garden.
It felt like an age had passed by the time she came upon the clearing. There, a small table stood between flowers and vines, catching the faint rays of light that penetrated from the tangled roof far above. The space was filled with a hushed velvet silence, only broken by the occasional sigh of the wind scraping over branches and leaves, and the soft hum of wings from the myriad of butterflies crawling over the blanket of moss and vines. The table was set for an opulent afternoon tea, fruits and cakes, luscious honeycomb, and two tea settings, yet this too had fallen into a state of decay. It appeared as if it had been waiting years for her arrival, and slowly time and nature had reclaimed it along with the rest of the estate. There was no sign of Rose, no sign any human had entered this place in many years. She brushed aside some of the plants overtaking one of the chairs, and sat down to ponder this odd situation.
Suddenly it struck her — the mysterious invitation did not actually specify a time, or a year. When had Rose sent it? Had it been delayed, perhaps even a decade, and only now mysteriously arrived?
A hushed sound like the brushing of long skirts over the forest floor pulled her back from her reverie. At the edge of the clearing, a woman was walking towards the little table. Only it was not a woman, but more of a glimmer and then a shadow, like light dancing on leaves, in the shape of a person. A breath was trapped in her throat in anticipation, what would this apparition do? When the vines wrapped themselves around her wrist, and then her ankle, rooting her to the wooden chair, she barely felt their soft embrace.
'In the Garden of Earthly Delights' Butterfly Collection
'The Faerie-Tails Collection II'
]]>
Archibald E. Moss threw the paper into the fireplace in disgust, watching it sputter into flames. Another rejection letter from the Royal Society, this time for his brilliant observations on the altered weaving patterns of arachnids under the influence of laudanum. Meanwhile, that twit Darwin had yet another paper published in the last quarterly - about an orchid and a made-up moth no one had ever even observed! Preposterous.
"What the Entomologist Saw" is an installation by Moth & Myth for Ghost Gallery
The realistic specimens in this installation are designed, printed, and laser-cut by Moth & Myth in downtown Seattle.
View the window at Pacific Place.
Shop Moth & Myth Fine Paper Specimens
Last year we brought to you our first ever Flatfish specimen. It has come to our attention that we made a serious error in designing this fabulous flounder. The real Peacock Flounder has a long pectoral fin, which our paper specimen was missing.
We pride ourselves on creating only the most life-accurate pancake fish, and we couldn't be more sorry about this mistake. We considered issuing a recall on these flawed flounders, but we thought it would be more eco-friendly for you to fix them!
To make this right, we have amended the specimen. Please save the image below, print this new fin, cut within the marked line, and attach it to your flounder.
1. Download and print out the "Fix Your Flounder" document. Gather your flounder, scissors, and a hot glue gun.
2. Cut out the flounder fin! Dotted lines on the print out show you where to cut.
3. Add a dab of hot-glue on the reverse side of your cut out flounder fin.
4. Attach the fin to your flounder! The new fin should go right over the incorrect printed fin.
5. Behold your fixed flounder!
6. Enjoy your fabulous fixed flounder!
We hope that you accept this sincere apology from all of us at Flounders & Fables.
]]>
1. Materials
The materials you’ll need for this project are:
2. The paint
We went a bit wild with the selection of spray paints - you certainly don't need this many! For a fun springtime Egg Dome, we suggest a few pastels with some darker shades for contrast. We use spray paint for a smooth even finish, but you can use acrylic paint as well.
3. Drill a hole in the eggs
Using your drill & 1/4" drill bit, drill a hole in the wooden eggs to match the size of your dowels. You don't need a deep hole just one that the dowel will fit comfortably in. We recommend doing this before painting the egg (unlike our photo)!
4. Paint the dowels
To paint them, make sure your work area is covered, and spray the dowels evenly while rotating. We use a gold/brass color for the dowels. To dry stick them upright in Styrofoam.
5. Paint the eggs
Once the dowels are dry use a bit of hot glue in the hole of the eggs to firmly keep the dowels held to the eggs. Once glue has dried mask the dowel with painters tape. Then spray paint and rotate the egg for an even finish putting them back in the styrofoam to dry or for heavier eggs a water glass w/out water making sure the egg doesn't touch the edges. Don't cut the dowels yet.
7. Assemble and Arrange the Egg Dome
To assemble the egg dome, we drilled 1/4" holes about a 1/4" down in the wooden base of our cloche to fit the dowels. We start drilling with the focal point egg. At this point you're not gluing the eggs in the drilled holes just planing. Ours is the large green egg.
Once you decide where your focal point is map out around your center egg. To create a dynamic display make sure no two eggs are the same height. After you're happy with where the focal point egg is next find where your tallest egg will go and drill the hole for that egg.
Now you're on a roll! Continue to place your next eggs cutting the dowels to size (alway check twice that the length is what you want before cutting) with the wire cutters and drilling a 1/4" hole to place in base. Make sure they all fit inside your glass cloche! Do not glue the dowels to the base until you're happy with the arrangement. Once you are happy, lift dowels out put a pea size drop of hot glue in the holes in the base and place the dowels back holding in place while the glue dries.
9. Enjoy the finished product!
We love the is project and think it's a great fit for any time of year. Inspired by natural bird eggs we added our own twist on them to make them extra special.
Following the steps above, it's fun and relatively easy to create a beautiful glass cloche egg dome that's perfect for spring and Easter time! We hope you've enjoyed this tutorial!
]]>
We are delighted to host two masterclasses in floristry with Katie Ellison of Seattle FlowerLab at Moth & Myth! Katie will be teaching an evening workshop on June 24th, and a daytime workshop on June 25th. To give you a better idea of Katie's creative process, and what will be covered in the classes, we conducted a little interview below!
How did you get started working in the floral industry?
When I was attending the University of Montana, I needed part-time work to make rent. I lived a block away from Bitterroot Flower Shop, a large retail and full-service florist right off the “hip strip” in the downtown area of Missoula. I basically squeaky-wheeled my way into a position doing customer service, refreshing the display cooler, helping with wraps, checking on plants and general upkeep at the shop - it seemed to me a perfect, convenient job during my studies toward my English degree.
I did this for about a year until a design position opened up. I have always been artistic and I’d been doing the chalkboard and window displays consistently so I was offered a tryout to get the spot. The lead designer Linda was absolutely incredible and she quickly picked up that I could copy her designs and had a knack for designing. This shop was big, and walked a line between pretty traditional “Teleflora” designs, along with some of the freedoms of “designer choice” bouquets. I learned every fundamental skill I have there, and I learned how to design confidently and quickly — a necessary trait for any busy flower shop designer.
Do you have a favorite part of your creative process?
The creative process at Flower Lab starts with a request from a client. I love this challenge of expectation mixed with my own skill and desire to impress. That said, I have a rather vast supply of colors, design forms and flower combinations that circle around in my head. I love to see a color palette expressed in nature, and then pull a selection of flowers and foliage that mimic it. I do this with color palettes I see in fashion, in home decor shows on tv, in other peoples’ floral designs, and on instagram of course! Greening a vase and pulling flowers that can express some beautiful image in my brain — self realized or inspired — is so formative and keeps things fresh and ever-evolving for me.
How do you feel your background in fine art and literature influence your designs?
The designs I love the most are balanced, textural, and definitely colorful. As a painter, I’ve always loved line movement, seeing the brushstroke, and having punchy, effective color, and I love to have a project to work on — these tendencies are perfectly suited for floral design. I initially struggled to view my floral design in the same special light as my painting (it was my paycheck and painting was my passion), but I now realize how limiting that is to my experience as a whole artist. My love of books and story and humanity (literature!) is completely suited for floral artistry. 99% of my designs are linked directly to a person and their unique human experience — the client, the birthday girl, my mother, a stranger in mourning. Storytelling and developing connections with another human is inherent in this craft. Additionally, my language skills help greatly with my communication. Being able to describe a bouquet concept or give a sense of my design vision to someone over the phone or through my consistent email communication is a daily occurrence. Years of writing prose and analysis in papers helps me confidently express myself on the daily, and these skills have helped me establish trust and mutual passion for flowers for many years.
Are there themes or ideas you think floral design is more suited to expressing than other art forms?
This is such a great question. While I’m generally someone who struggles to place art forms in competition with each other, I also cannot help but find floral design to be so vastly effective in a broad range of areas. The beautiful yet fleeting nature of a cut flower is something that powerfully reminds us of life itself. When we use flowers to celebrate big moments in time, they are really granting a two-fold gift for that moment — the pleasing feast for the eye that creates a special, thoughtful experience and, in its grandeur, the hidden reminder that this experience is transient and worthy of our reverent attention.
I’m always reminded that flowers are indeed a luxury good that we’ve chosen to embrace because of their essential presence. As with any art form, the creation of a floral design must have meaning and skill behind it to justify its presence. Being there for people from birth to birthday, parties to marriage, and then perhaps most importantly in those moments of death, is a gift for any florist. In those moments of life that are beautiful, fun, difficult, shattering — the peaceful meaning of cut flowers designed expertly is both powerful and essential to my mind.
To learn more about the workshops Katie will be teaching, please visit the Realms Classes page, and to discover the world of FlowerLab, visit Instagram and seattleflowerlab.com
]]>While illustrating for a diverse range of clients, she has also participated in conventions and gallery shows all over the country. She is currently art directing an indie game based on her OddFauna creatures where each character in the game is hand sculpted.
Emma will be teaching how to create whimsical plants & flowers in 'A Garden in Miniature,' June 3rd & 4th, and fantastical creatures in the class 'Finding Your Familiar' on June 4th & 5th. To give you an inside look into Emma's inspirations, and a taste of what you'll learn in the workshops, we conducted a little interview below.
How did you first form the world of OddFauna?
I started making little one of a kind creature sculptures over 10 years ago to sell alongside my illustration work at shows. A friend of mine showed me how to make a simple one-part mold, and things kind of took off from there. I taught myself different mold-making and casting techniques and, through lots of trial and error and playing around with different materials, I was able to expand what this little one person shop was capable of creating.
Inspired and influenced by many things that I’ve loved since childhood, I feel like the seed of OddFauna has existed in one way or another for as long as I can remember. This beastly world grew organically over the years as I painted and sculpted different characters and stories. Often playing with opposites, this strange world of mischievous beasts can be dark and funny, beautiful and unusual.
When creating your fantastical creatures & flora, do you draw inspiration from the natural world?
Definitely! I’m kind of obsessed with watching nature documentaries and find a lot of inspiration in the natural world. There are so many strange creatures that exist, and bizarre animal behaviors to draw from. A new creature idea can stem from some widely unknown animal or plant, or can simply be inspired by a leaf or lichen that I come across on a forest walk in my neighborhood. The OddFauna world that I’ve been creating is really a mixture of all the things that I love. I also find a lot of inspiration in mythological creatures and cryptids, often combining elements of different creatures (real and imaginary) to come up with something that is unique in itself.
Do you have a favorite part of your creative process?
Oh boy, that’s hard to say! I kind of love all the stages, but it depends what sort of mood I’m in. It’s always exciting to start a new big creature sculpture. I love the challenge of translating my 2D work into 3D, especially when an image has a lot of flowy movement to it. It’s kind of like a puzzle to solve. Trying to bring the lightness and energy of a watercolor painting to a solid form is tricky, and I am always playing around with different techniques to try to achieve the right balance which keeps things interesting.
Painting a sculpture is a little more meditative for me which I love in a different way. I like to throw on a podcast and just get lost in the details.
Without giving too much away, what are you most excited to share in your upcoming in-person workshops at Moth & Myth?
Besides sharing some of my favorite techniques, (and hopefully without sounding too cheesy) I think that just sharing the joy of sculpting with others is going to be a real treat. One of the reasons I love sculpting is that a part of me feels like a little kid who gets to play with clay all day. No matter what your skill level is, making things is fun, and I’m so excited to see what adorable tiny things everyone in class comes up with.
To enroll in the classes, visit the Realms Classes site, and to see more of Emma's work, please visit & follow @oddfauna.
]]>Embellished with shiny teal foil, the new 'Aurora' Gemstone Morpho Butterfly Set embraces the marriage of cutting-edge printing technology with old-world fine-paper finishing techniques, making an eye-catching gift. Use these colorful butterflies to decorate a wreath, or give the set as a gift to inspire the receiver!
With vibrant blue wings, the Morpho butterfly makes a statement. The 'Morpho and Monarch' 5-Pack features three styles of blue Morpho butterfly, one Pearl Morpho butterfly, and one Monarch butterfly. Of all the species of butterflies, we find that these inspire the most nostalgia!
Don't be fooled by the name - the 'Spring' Luna Moth Set is perfect for every season! Featuring two versions of the distinctive Luna moth (Actias luna), and a Pearl Morpho Butterfly, this three-pack is a timeless favorite, and a wonderful introduction to the beauty of moths and butterflies. These life-sized specimens make gorgeous additions to gift-wrap as well!
With soft frosty tones, the 'Pearl' Mini Moth Set makes a wonderful holiday gift. Gift it as a set for the lucky receiver to get creative with, or make ornaments to give as presents!
The stunning 'Moon Glimmer' Butterfly Set is based on real specimens that have had the prismatic-scales on their wings removed, leaving only the delicate structure beneath. Their pastel tones are perfect for the holiday season, shimmering on pearlescent paper.
The 'Faerie-Tails' Collection is one of the most beautiful sets we carry. Featuring 8 of the most lovely tailed moths all of whom come in a wonderful vintage inspired booklet. This is a unique and wonder gift to keep for yourself or to give someone who has that spark of Faé in them!
Another of our favorite collection sets, the 'Antiquarian' Collection includes ten pearlescent specimens, perfect for the season of snow. Their pallor gives them an ethereal beauty, and their cream and rust colored wings shine brilliantly in any specimen case. Packaged in a gorgeous booklet, perfect for safe keeping or as a lovely gift!
We hope that this gift guide has been helpful, and that you and your loved ones are inspired by the beauty of nature this holiday season!
]]>For this installation, we used the brand new Mint Morpho Butterfly Set, which features the same butterfly (Morpho catenarius) in various sizes, giving depth and volume to the flurry of butterflies. Once our team had styles the wings, we spent all week covering the gallery in a flock of thousands of butterflies, which fluttered up the walls and windows and across the high ceilings.
At the centerpiece, holding our large-scale bell jars, is the fanciful Moth and Myth 'ice-cream' cart, which we can't wait to take to events and conventions!
All you need to create a wall of butterflies at home is paper butterflies, and a bit of double-sided photo tape! To create this look, we gently shaped the butterfly wings by curling them around our fingers, adhered a bit of double-sided photo tape to the back (which features an alternate gold design!), and pressed them firmly to the gallery walls.
This installation will be up for the rest of December 2021, and runs in conjunction with two fantastic art shows. Roq La Rue gallery is open to the public Tuesday - Saturday 12-5pm
We were so delighted to meet everyone who was able to come to the opening reception - it's one of our greatest pleasures to meet the artists and creators who are inspired by the realistic vegan specimens we create! We hope to see you again at future Moth and Myth events!
To learn more about Roq La Rue Gallery, please visit roqlarue.com and to see more photos from the installation, visit instagram.com/roqlarue/
]]>What made you start creating and photographing still-life arrangements?
I picked up photography around the age of 15 (18 years ago!) after falling in love with using a disposable film camera on one of my trips to San Francisco. I went nearly every year to California to visit my beloved aunt, who is the reason I fell in love with art in the first place. Her house was, and still is, full of a collection of diverse, incredible artwork. She encouraged my artistic endeavors all my life and was the motivator I needed to pursue art college.
In art college, I studied art history alongside photography and became enamored with the works of the old masters. I am a lover of secret things, and still lifes have so many symbols and layers to uncover. I was instantly hooked and began creating my own. I made a career doing mostly portrait work after college. I kept photographing still lifes for my own enjoyment, but didn’t show them to anybody until the past few years, when I started to feel like it was all I wanted to do.
Once I started to post my still lifes, my art took off on social media more than it ever had before. At this point I absolutely do not see myself doing anything else photographically for a long time, if ever. My creativity is now deeply rooted in the very hands-on process of shaping and making the arrangements themselves. The thought of making photographs without that process feels very empty to me. Which is not to say that I don’t like making other types of photographs alongside the still lifes, it is just the core of my practice now to work this way.
Above is an exclusive first look at a new piece by Forest Noir, featuring a Moth and Myth paper spiderweb and spider. To read what Alyssa has to say about this brand new seasonal image, please visit Instagram!
Do you have a favorite part of your creative process?
Yes! I love creating the actual compositions that I photograph. Shooting is very technical and can be stressful because I have perishable sets that start to wilt if I don’t get it right within a certain time frame. I always say that my camera is just a conduit, not the entire process. Plotting the course for each unique piece and shaping the items with my hands is self-therapy and very enjoyable. Making still life* is such a reverent and cathartic act for me. I also do enjoy editing – I relax with music and edit with a tablet and pen so that I can paint in the dark and the light in the precise way I want.
While your arrangements appear deliberate and posed, they also feel organic and effortless. How do you achieve that balance?
They are definitely both of those things. Even with my extensive planning, in the moment of creation, the piece takes on a life of its own and morphs before my eyes. In my head something might work perfectly, but then I take that idea to work with, and know that I cannot be married to it. It will never end up the way it is in my head, but usually ends up better anyway. I let the materials guide me, I let my hands just sort of figure it out. It is a fairly chaotic process to have a grand plan and be prepared to abandon half of it, and that disorder manifests itself visually. What you refer here to as “organic and effortless” - to me is just beautiful, organized chaos. I think since my process is half plan, half seat of my pants holding flowers, it ends up at a wonderful crossroads where my personal, recognizable style sits.
Do you set out with a plan or mental image you try to recreate, or are you inspired by the flowers and materials you find?
All my creations are tied in incredibly personal ways to my thoughts, experiences, grief, hopes, fears, inspirations, and beyond. As such, they take a long time to plan, and most have complex backstories which I reveal in the captions of my Instagram posts. I do have a few “spur of the moment” pieces, but in general they are in the works months before anyone sees them. I sketch my compositions, scout out and buy props, then sometimes shoot trial versions. I decide for, or against certain flowers. In some cases, the piece has been reshot 3 times before the public sees it. I currently have a handmade, prop intensive self-portrait that I have been working on for over a year!
While all the flowers you use are organic, you work with our vegan paper moths and butterflies! What inspired you to use these over real specimens?
I have been an animal lover since childhood. I make as much effort as I can to eliminate and reduce harm to animals in my everyday life choices. I also love to volunteer with them, and I run regular fundraisers for animal rescues and charities. My shop mascot and beloved companion is my rescue bunny, Laszlo. In lieu of real specimens, I can use Moth and Myth’s incredibly realistic paper creations and not harm any animals in the process! I can’t be 100% sure any real specimen is truly “cruelty-free” and it feels more respectful to use paper. Plus, they are gorgeous and the possibilities are never ending. I love seeing other artists use them in so many ways!
How would you say darkness and light factor into your work?
Chiaroscuro is at the core of my photographic style, and subject matter. There is extreme dark and bright light in my work, both visually and thematically. I do pieces with harsh lines, enveloped in shadow, followed directly by whimsical pastels the next day. Although I am never completely either, I think that stylistically I do err on the side of darkness. Darkness interests me because in shadow is where all the good secrets of the world lie, and as I mentioned before, I am a lover of secrets. I need the light to unearth those hidden meanings, and more often than not, the subjects of my work ring of light, beauty, truth, hope, and love. These things exist within, and sometimes parallel to, darkness. Two necessary and symbiotic sides of the same coin. I enjoy walking the line.
Is there anything else you’d like to share with our readers?
If you are interested in learning more about my life and process, I have a special FB group, called The Forest Noir Social Club, where I share behind the scenes information and photos, answer questions, and give away things like phone backgrounds.
Also - I will be vending Darksome Craft Market the 3rd of December and it’s an online market!
* Social links/Website:
IG: @forestnoir
Site: forestnoir.com
]]>We think it’s so cool that you are partners working together on Brimstone Bindings! Do you collaborate on pieces or prefer to work individually towards a common vision?
Typically we work individually to give ourselves more creative freedom to do what we feel. When we do collaborate, it’s always exciting to see what we come up with together.
What made you decide to start creating jewelry?
Well, I’ve been creating as far back as I can remember. Somewhere along my artistic journey, I gravitated towards jewelry making. My love for stones played a massive role in that for sure. There’s something truly magical about adorning yourself with earthly treasures.
How do you choose the crystals, stones, and other materials you use in your creations? Are certain ones particularly meaningful for you?
My process for choosing crystals depends on the collection or piece I’m creating. Sometimes particular stones call out to me, and I feel compelled to create with them, basing my collection around those stones.
Other times I have designs in mind where I scout out the perfect stones that fit my vision.
Do you let your materials lead you in a certain direction, or do you set out with a plan and search for elements that fit your vision?
I would say both. I like to plan out things, source new materials, and find ways to use some of the materials I have.
Your imagination and creativity are so apparent in your creations! How do you nurture those parts of yourself, and what do you do when you feel stuck?
I’m always full of so many ideas, it’s a little crazy. I think the hardest part for me is staying focused on a particular concept and not drifting off into my enormous imagination pool
To learn more about Brimstone Bindings, please visit their socials and shop!
Shop: https://brimstonebindings.com/
Email: Contact@brimstonebindings.com
]]>
We love that you use eco-friendly packaging and vegan sourced materials! What are your reasons for prioritizing sustainability, and do you find it challenging to do so?
It’s a tough one, because I’m under no illusions that resin is “eco-friendly,” sadly. It is for me an art meant to last a lifetime, and I try and come at it respectful of that. (Although I have been playing around with the “Eco-resin” brand, which is 80% plant based.) But when I got bit by the resin bug, I fell head over heals in love with the process, and I’ve done my best to find areas to bring sustainability to my business.
A big way I’ve done that is with shipping. All my packages are biodegradable, including any tape I might use. I use recycled tissue, or reuse padding from packages I receive. I also don’t go in for all the extras, like little bags of candy, not because I don’t want to, but because it was an easy way to cut down on waste.
I started vetting all my suppliers for being vegan, because I am vegan, and my art supplies are just another extension of that. I didn’t know much about the process to make these things to begin with, and animal testing is so pervasive and disgusting, that I just started emailing people without too much thought. And that’s lead to a lot of mean emails back from companies that are disdainful I would even ask. I just ignored those companies, and purchased from and shared info about companies that responded back positively. And that’s a big reason I’ve loved your brand from the start, you are openly vegan, and just a wonderful, guilt-free, art supply option.
Were do you find your inspiration?
So much of it comes from the moment itself, it’s just play, I live for it. I have all my supplies at my fingertips, and while I usually have some ideas, I really just love going at it. The themes in my pieces usually come from the main centerpieces, like beautiful moths from you, or decals I’ve designed. And all the additions, the glitters, pigments, and florals, they’re like painting in that moment.
What’s your favorite part of your creative process?
With resin is always been the final reveal. I deeply love the pours themselves, that creative time and intense focus. But there is a heavy serotonin buzz that comes from that final peel out of the mold.
Lately, it’s also been the fun process of designing my own molds. It’s a long process, taking it all the way from a sketch on paper, to peeling a finished piece out of a mold I dreamed up. But it’s incredibly satisfying. My husband helps with the mold making, so it’s a team effort.
I’m also getting in to ceramics again, practicing so that I can incorporate it as a part of my shop. I’m madly in love with wheel throwing, and sitting down at my wheel gives me a meditative sense of peace.
Do you experiment while creating, or set out with a plan?
The way I work with resin is a layered process, and a lot of it does take some planning. So as much as I love to “paint” with moths, florals, and glitters, that is one layer of many, and so it’s really a mixture of play and planning.
Your work is so vibrant and uplifting! How would you say that living in San Francisco and being a part of the LGBTQIA+ community influences your work?
That’s the sweetest, thank you! I live outside of San Francisco, and living in the Bay Area is fantastic. But the town I live in specifically is a little conservative, and last year was the very first year my town had a pride celebration. Don’t get me wrong, I love my town, but I’m really grateful to be a part of the budding pride community here. I’m really looking forward to October and this years pride celebration, I got offered a booth, and I can’t wait to be a more visible member of our community. As a pansexual woman married to a man, on the surface I pass for straight. But being open and loud about who I am is important to me, especially because I’m a teacher. (I teach art at a local high school.) So of course my art is an extension of that, and gives me a concrete reason to spread pride and openness locally.
We think it’s great that you share tips and tricks on your account! How do you think members of the arts community can best support and encourage one another?
Sharing my process is extra important to me because it gives me a chance to talk about safety. While epoxy resin has been around and used creatively for decades, it’s really reaching its peak now, and not enough is being said about working with resin safely. You can buy kits geared for children in craft stores. (Which is deeply horrifying.) As resin cures, it off gasses fumes, and should only be used wearing full protective gear and in properly vented spaces. (Properly vented for me turned out to be outside.) So sharing how to dome, or my process for making ears, doubles as a chance to talk about safety, and the teacher in me prioritizes that.
But the perks of creating at a time where resin is at its peak, is that its an incredibly innovative community. But that innovation doesn’t exist in a vacuum, we learn from each other. Instagram is full of amazing artists making amazing things, and it’s incredibly inspiring. I’m just grateful to be a tiny part of that.
Is there anything else you’d like to share with our readers?
Just a thank you to you, Moth and Myth, I love what you do. You fill a niche the art community has for quality moths and butterflies that are sustainable and cruelty-free. I’m grateful for that.
To learn more about Moonlit Made, and for avaialble pieces, please visit their socials and shop!
Instagram: @moonlit_made
Tiktok: moonlit_made
Etsy: moonlitmadeart
Email: moonlit.made.art@gmail.com
]]>What made you decide to start creating jewelry?
I can remember many many years ago, I started playing around with beading and making very basic earrings and necklaces! It was nothing special and I gave it up for a while - I immigrated to Australia and had kids - the feeling has always been there though. I love anything to do with crafting of all sorts and would happily spend hours just watching people with their craft!
Where do you find your inspiration?
Colour colour colour! I love colour but I've also always love the gypsy/boho/spiritual side of life and so I find that butterflies, feathers and wildflowers captures these aspects.
Do you feel like living and working in Australia influences what you create?
It has certainly helped to a point, as Australia has amazing bird life! I'm never short of feathers in stunning colours! And the wildflowers - oh they are beautiful and they are everywhere! We are very lucky here Down Under!
I live on the edge of the desert, in a remote outback mining town, the flora and fauna is pretty limited here and so the butterfly range is not as grand as it can be in some of the lusher parts of the country - one of the reasons I was pretty happy to come across Moth and Myths Instagram page - more choices in colour of wings. The perks of social media - the exposure to inspiration!
How did you develop your technique?
Social Media and YouTube!
Ask my Mom - the first black and white beaded earrings I made for her (insert face palm)... there was no access to internet back in the days for me and I felt stuck with my technique, that's also probably why I stopped for a while. I felt very deflated and irritated!
Finding my niche! I had been dabbling with different types of craft for a few years and my husband said that I could never lock down one style. I kept finding my way back to my jewellery tools and one thing led to the next and here I am today!
Trial and error! - I certainly learnt what works for me with my resin and what doesn't, like certain resin stripping colour from wings and fresh flowers! The amount of duds I've had to chuck but I then learnt very quick what works! When to laminate and when not to. How much resin to drop gently on each wing to get the perfect dome.
What’s your favorite part of your creative process?
When I finish a pair of earrings and I just feel, wow! They done! They are perfect! I love that feeling!
I also get very excited when either myself or a family member finds a unique feather - it's almost like a competition of who can find the best feather for Mom!
We love that you post inspirational and thoughtful quotes when you share your lovely creations! Do you find that making art helps you stay centered?
I do get very frustrated at times and have to take a few days breather but seeing what I've created at the end makes it all go away! It's also something that's "mine" - being a full time stay-at-home Mom, you can understand, having a little something that I can escape to. I try and find quotes that resonate with how I'm feeling on the day or to personal situations I'm experiencing at that time.
Is there anything else you’d like to share with our readers?
Butterflies have always been a part of my life. My Dad was a keen butterfly collector back in his youth when we lived in Zimbabwe and I can remember snippets of memories with him, from sewing nets, to making food, pressing, identifying them - he always talks about his collection he used to have. I still recall these two massive butterfly encyclopedia type of books he had! He still enjoys butterflies but doesn't collect them anymore.
I get most of my natural wings from either butterfly breeders, butterfly sanctuaries or butterfly houses and I've also been known to pull wings off deceased butterflies that have become stuck in car grills... only naturally deceased and ethically sourced. All my non natural wings come from you at Moth and Myth.
I am busy setting up an online shop. I hope to go live within the next two months! I can't wait. I'm so excited!
Materials:
Butterflies: We’re working with the Blue and White Morpho Butterflies. Any of our multi-packs are great for this project!
Bell Jar: Ours is from IKEA and is 10 3/4” tall. You’ll want to find a bell jar with a wooden base, since you will be drilling into the bottom.
Rod: We use a clear plastic rod sourced from a plastic supplier.
Wire Cutters: To clip the plastic rod.
Drill: You’ll use the drill to make a hole in the wooden base of the bell jar.
Hot Glue: To shape and attach the butterflies.
Plus: Your hands and creativity!
Our Blue and White Morpho Multi-Pack comes with 15 of the same type of butterfly. For this size of bell jar, you’ll only need 10 butterflies, which means you’ll have extras for other projects, or to attach to the outside of the bell jar. Any of our Multi-Packs are perfectly suited to this project!
Step 1: Shape the butterflies
We begin by making our butterflies look as lifelike and 3D as possible. With your fingers, gently curve the upper and lower wingtips away from you. Place a tiny drop of hot glue on the upper edge of the lower wings, and gently fold the upper wings over the glue, pressing down until the glue has hardened. This simple styling give the butterflies the appearance of flying and makes them sturdier to work with!
Step 2: Cut the rod to fit the bell jar
Your plastic rod may come in a very long piece, and you’ll need to cut it down to fit your bell jar. We approximate and measure by eyesight, and then cut the rod with wire cutters. The ends don’t need to look pretty because they’ll be hidden by butterflies and the wooden base of the bell jar!
Step 3: Drill a hole in the wooden base
You’ll need to drill a hole in the wooden base of the bell jar, for the plastic rod to sit in. Match the diameter of the rod with the size of your drill bit, for a snug fit - this way you won’t need to use any glue to keep the rod in place! Just be sure not to drill all the way through the base!
Step 4: Arrange the butterflies!
Now comes the fun part! We like to start at the upper tip of the rod and work our way down, attaching each butterfly with a drop of hot glue. Angle the butterflies to give them the appearance of flying and to create volume. Remember they can fly in any direction!
Since our specimens are printed double-sided, they'll look great from any angle! Rotate the rod as you work to make sure you’re filling in any empty spaces. Experiment with placement before you commit to glue, and have fun with your design!
Step 5: Put it together
Once you’ve attached your butterflies to the rod, all that’s left is to put the bell jar together and to enjoy it!
If you've drilled a tight enough hole in your base, you won't need to use glue to hold the pin in place, but you can always add a bit for extra stability!
We hope that this tutorial has given you some ideas about how you can work with our Single Specimen Multi-Packs! Remember bell jars come in all shapes and sizes, and there’s no limits to what you can do. We can’t wait to see what you’ll create!
]]>Please visit her Shop and Instagram to learn more about pieces and availability!
All images and objects by Roxy Schultz, Wild by Design
Instagram @roxy.schultz
Right-Click the image below to download and print the full-size sheet, or follow this link to download the image.
"In the popular imagination the butterfly has long served as a symbol of transformation and change. We are awed by its progression - from egg, to caterpillar, pupa, to winged adult. It is easy to see why the butterfly reminds us to change and grow, to evolve gracefully through the stages of life in order to one one day emerge in a more glorious form.
The cicada, in contrast, offers a more radical and challenging symbol. Cicadaʼs have no pupal state. They transform abruptly and mysteriously from nymph to airborne adult in a single molt. Depending on species, they may spend one to nine or more years as underground larvae before eventually emerging into the heat as a singing scion of summer.
The cicada reminds us that sometimes we must embrace radical change, rather than gentle transformation. There is a time to cast off the old and break with the known. The skulls and flowers included in this illustration are reminders of the way death yields new life, the changing of season, and the inexorable march of time." -Siolo Thompson
A Pacific Northwest based illustrator/writer, Siolo’s work reflects a love of nature, travel, magic, books, and cuisine. Her imaginative projects have been published by Llewellyn Worldwide Publishing, McSweeny’s, Victoria’s Secret, Facebook, Astrology.com, and many others.
From Llewellyn's 2021 Greenwitch Botanical Calendar
In Siolo’s distinctive illustrations, intricate florals interweave with fanciful fauna. Soft splashes of color dance around her imagery, drawing the eye from one fantastic form to another.
From the Hedgewitch Botanical Oracle
Siolo's work is both enchanted with magic, while deeply rooted in the natural world. Simultaneously minimal and rich with hidden meanings, Siolo’s illustrations beckon us to another plain, while showcasing the subtle magic of the world around us.
Siolo’s recent projects include Llewellyn’s 2021 Greenwitch Botanical Calendar, the Otherkin Tarot deck, the Hedgewitch Botanical Oracle, and the bestselling Linestrider Tarot deck, which can be found in stores worldwide. We're excited to giveaway 4 of her tarot decks during Customer Appreciation week!
From the Linestrider Tarot deck
To learn more about Siolo and her latest endeavors, please visit her website!
Don't forget to download the free coloring book page!
]]>Fun Fact: Did you know that a group of butterflies is called a Kaleidoscope?
To start, we got a Keepsake Box from a craft store. These boxes are great for displaying memorabilia and curiosities. The one we chose is 11”x14” with a 1.5” depth, and features a back wall covered in felt.
To adhere our butterflies to the box, we used one-sided velcro with sticky adhesive on the other side, which we cut into small pieces to fit the butterflies. This strategy worked well given the material of our shadowbox, but you can also use small pins to pin the butterflies, as you would with real specimens.
While working with hot-glue is a great way to make your shadowbox durable, we suggest finalizing your layout before using such a permanent option!
Starting with the center of your design is a great way to make sure the kaleidoscope spirals out evenly. We decided to work outwards from small to large, but the opposite looks great as well!
To make your butterflies appear more lifelike, bend them at the crease between wing and body, and gently curve their wings with your fingers.
Continue working outwards with your design. We made many adjustments along the way depending on what looked and felt right. There’s no right or wrong - just have fun and play with the placement!
Look at what you're doing from different angles to get a new perspective!
When you’re happy with your butterfly kaleidoscope, simply put your Shadowbox frame on the backing, and enjoy it!
We chose the Monarch and Viceroy butterflies for this project because they are available in three different sizes in our shop (Life-sized, Mini, and Micro), but you can create wonderful kaleidoscopes using just regular sized butterflies or minis as well!
If you would like to order any style of butterfly in bulk, as we used in this project, please email us at wholesale@moth-and-myth.com
]]>Holiday style is all about shimmer and magic. The Snow Queen Collection is a wonderful addition to any holiday tree! To create this look, we gently nestled the moths, butterflies, and cicada on the branches of a frosty Christmas tree - leave on the backings so you can use them as stickers later!
Another charming way to incorporate "The Snow Queen" and "Frost" Mini Holographic Sticker Sets this holiday season is by decorating home-made candles! Either make your own candles from scratch, or adorn pre-made candles with clear votives. Mixing and matching varying sizes of candles and butterflies makes for a beautiful display.
It's easy to create a whimsical holiday environment with these icy beauties! These butterflies, moths and cicadas remind us of living ice sculptures, and we hope they brighten your holidays!
The giftable "Snow Queen" set, presented in a booklet inspired by vintage fantasy illustrations and gift envelope, makes for a perfect stocking stuffer!
Photos and Styling by Moth and Myth
Location: My Little White House (https://www.mylittlewhitehouse.com/)
Lighting
Pick a spot that has natural lighting but not direct sun light. Natural lighting helps the color look the most accurate. A shaded outdoor patio is a great place to set up for your photoshoot!
Avoid: Fluorescent, over head, and direct sunlight. Any light that skews in the extreme can cause unwanted shadows, make the work look flat, causes glare and alters the color, which can be hard to correct.
Background
Select a simple, clean, light or dark background. This will help your artwork stand out and look its best. We used a large white piece of drawing paper on a clipboard for our shoot. If your artwork is light, a dark background may help it pop instead!
Avoid: Cluttered and patterned backgrounds. These distract from the work and pull focus. If you do have a patterned background, use a Tilt Shift tool on the Instagram photo editor, or shoot in Portrait Mode to soften the background and make your work stand out (example with the fern photo below).
Shoot
Shooting straight downwards at your piece in a flat-lay is a great way to showcase your work. Our set-up was on low table so we could shoot directly downwards at a comfortable height. You should have at least one photo of your piece that represents it in this way. Try other angles too that you can share and add to the product listings.
Edit
Look through your photos to see which ones stand out the most, and edit those! If your photos are shot in soft, natural light, they won’t require much editing, but a few tweaks like added brightness can help them shine! Since most platforms favor square photos, make sure your artwork is centered in the frame and leave yourself a little room to crop on the long sides of your shot.
Best Filters to use on Instagram:
Before and after comparison of the edited photo and original. We used the Instagram edits listed above, increasing brightness, brightening highlights, dialing up contrast for clarity, and increasing saturation for vibrancy.
The last step is simple...
Share your work! You've shot multiple photos, edited the ones that stand out and now it's time to share! Hooray!
Portrait Mode: If your phone camera has Portrait Mode, try using it when shooting your artwork! This setting will blur the background like a traditional camera lens would.
Find your style: Have fun and play around - don’t be afraid to try things that don’t end up working, and discover what fits your unique artwork!
Humanize the photo: We naturally respond more to photos that have a human element, and this is easy to utilize in your product photography! Try taking photos of your hands holding your artwork, or enlist a friend to help you get the shot! This will humanize the photo as well as your artwork.
We hope this has been a helpful guide. Have fun with your shoots, and tag us in your photos @mothandmyth! We can't wait to see what you'll create!
Thank you to Breana Murphy (IG @slightlycrude) for lending us the beautiful resin piece for this tutorial!
Featured in our limited ’Witching Hour’ Collection, the giant owl butterfly is perfect for the spooky Halloween season. While many butterflies are day-flying, the owl butterfly prefers to fly at dusk. Their Latin name “caligo” means darkness.
While all of our paper specimens are double-sided, the Giant Owl Butterfly is one of just a few that features a distinct reverse side, which is no less striking than the owl-like underwings.
Front and back of the Giant Owl Butterfly and White Witch Moth
Owl butterflies are very large, ranging from 3”–8”, and our papercut specimen is approximately 5” across. A tiny version of this giant insect can be found in our ‘Halloween’ Mini Collection!
How will you use the Giant Owl Butterfly in your art and decorating?
]]>Found from Uruguay to Mexico, and even as far north as Texas, this impressive insect also goes by common names ghost moth, great grey witch and great owlet moth. Many South American cultures believed these moths are a messenger to the underworld, carrying the souls of the dead on their large wings.
The White Witch Moth is a featured in our limited “Witching Hour,” collection, and a miniature version is included in the "Halloween Minis" set. It’s a beautiful and wonderfully spooky addition to our specimens!
]]>
Vintage Liebig Trade Card featuring Acherontia atropos
There are three species in the genus Acherontia. The most widely-known of these is Acherontia atropos, found in Europe and Africa, made iconic by the Silence of the Lambs book and film. Acherontia styx and Acherontia lachesis are similar in color and native to Asia. All three species are included in our seasonal “Witching Hour” collection!
Acherontia atropos is the fastest moth in the world, reaching speeds up to 30mph, and is able to hover in the air. Acherontia lachesis in particular has been known to raid the hives of honey bees. However, the Death’s-Head Hawkmoth isn’t all frightening: when disturbed, these moths emit a high-pitched squeak!
How will you incorporate Acherontia into your Halloween decor?
]]>
Photos and Styling by Moth and Myth (@mothandmyth)
]]>